We have created a awesome theme
Far far away,behind the word mountains, far from the countries
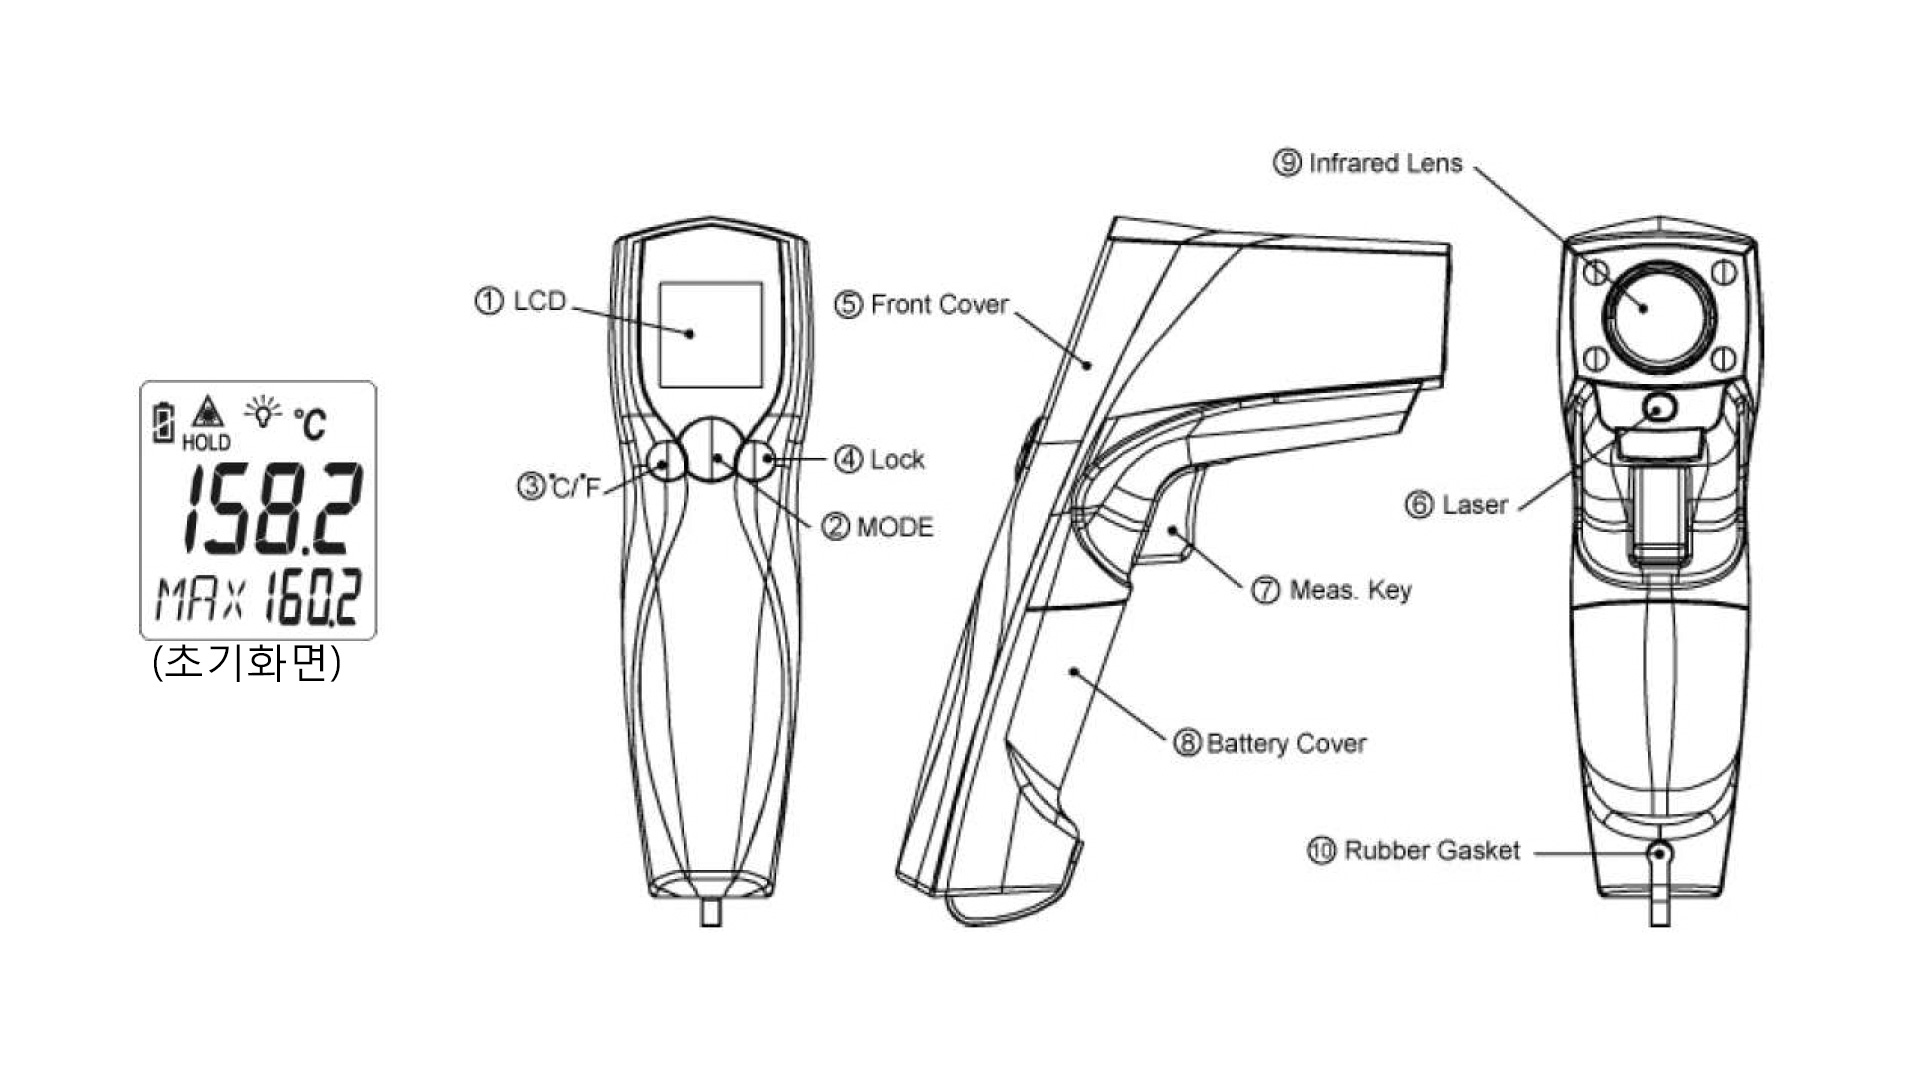
 PRODUCT > PIR-550


 |
Here will show the emissivity data. (The default emissivity is 0.95) |
|---|---|
| Press Mode key (2), then press Lock key (4) or ℃/ ºF key (3) to set the emissivity, then press Mode key (2) to confirm it. The emissivity can be changed from 0.10 (10E) to 1 (100E). | |
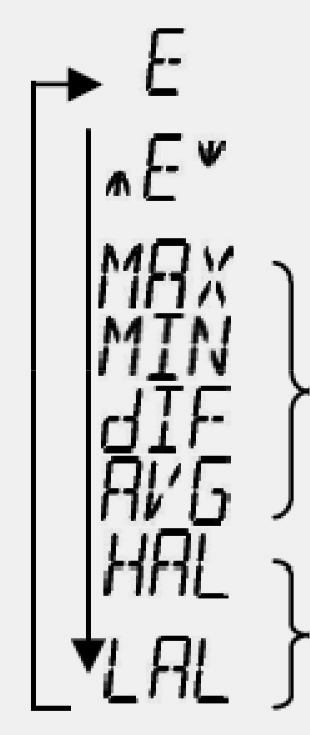
| Press Mode key (2) for the Maximum (MAX), Minimum (MIN), Different between MAX and MIN (DIF) and Average (AVG) modes. During the measurement, the special modes reading will be displayed beside the mode icon. | |
| Press Lock key (4)or ℃/ ºF key (3) to change the High Alarm (HAL) or Low Alarm (LAL), then press Meas. key (7) to confirm it. When the reading is outside the High Alarm (HAL) or Low Alarm (LAL) limit. The High or Low icon will flash and you will hear a beep sound. |
| In E, MAX, MIN, DIF, AVG mode: |
Press Lock key (4) for LOCK mode ON/OFF. The lock mode is particularly useful for continuous monitoring of temperatures for up to 60 minutes. Press ℃/ ºF key (3) for ℃ or ºF transferred. |
|---|---|
| In all modes: First hold on the Meas. key (7) | and press Lock key (4) for backlight function ON/OFF  |
and press ℃/ ºF key (3) for laser function ON/OFF.  |
|
| Memory | Memory Recall the last reading memory by pressing Mode key (2) while power off. |
 |
‘Hi’ or ’Lo’ is displayed when the temperature being measured is outside of the settings of HAL and LAL. |
|---|---|
 |
‘Er2’ is displayed when the thermometer is exposed to rapid changes in the ambient temperature. |
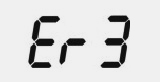 |
‘Er3’ is displayed when the ambient temperature exceeds 0℃ (32°F) or +50℃ (122°F). The thermometer should be allowed plenty of time (minimum 30 minutes) to stabilize to the working/room temperature. |
 |
Error 5~9, for all other error messages it is necessary to reset the thermometer. To reset it, turn the instrument off, remove the battery and wait for a minimum of one minute, reinsert the battery and turn on. If the error message remains, please contact the Service Department for further assistance |
 |

| 
|
|---|---|---|
| ‘Battery OK’: measurements are possible | ‘Battery Low’: battery needs to be replaced, measurements are still possible | ‘Battery Exhausted’: measurements are not possible |
| Measurement Range | -60 ~ 550℃ |
|---|---|
| Operating Range | 0 ~ 50℃ |
| Accuracy | Measured value ±2% or ±2℃ |
| Emissivity | 0.1 ~ 1.0 (default value: 0.95) |
| Response Time | 1 sec |
| D:S (Distance:Spot) | 12:1 |
| Battery Life | min 14 hours continuous use |
| Dimensions | 143.9 x 116.73 x 42.78mm |
| Weight | 180 grams(6.35 oz) including batteries (AAA*2pcs) |